JavaScript Library
The information within this section of the developer documents is related to implementing the PosBuddy application using the JavaScript Library.
The below list highlights the headings you will find within this section.
- Installation
- Getting Started
- Other Features
- API Reference
Installation
The only step that is needed to use this plugin in your JavaScript project is to include the plugin file.
<script type='text/javascript' src='posbuddy_x.x.js'></script>Getting Started
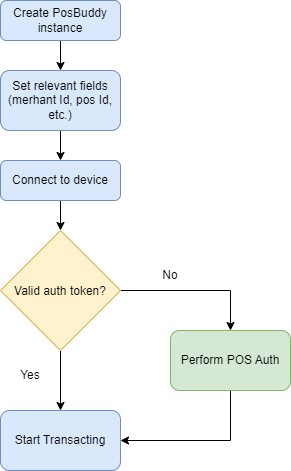
The process of getting the posbuddy library up and running is very simple and can be done by following these steps:
- Create in instance of
PosBuddy - Set the relevant fields (merchant Id, pos Id, etc.)
- Connect to the posbuddy device
- Perform a POS Auth (only if you haven't done so before)
- Start transacting

-
Create an instance of PosBuddy
The posbuddy class constructor only has one parameter, a callback function to handle any messages logged by the websocket used for communication.\
function posbuddyLogCallback(logType, message) { console.log("[" + logType + "] " + message); } var posbuddy = new posBuddy(posbuddyLogCallback); -
Set the relevant fields
There are only a handful of fields that need to be set before connecting to a posbuddy device. These fields contain the merchant ID and pos ID that are used to for transaction and identifying the POS. The only conditional field is the authentication key. If a successful POS Auth has already been completed and a valid auth token has been obtained, this field can be set before connecting to a device.\
posbuddy.setMerchantId("merchant_id"); // Merchant ID obtained during the onboarding process. posbuddy.setPosId("pos_id"); // Any user defined identifier for the POS // Conditional auth key field posbuddy.setAuthenticationKey("auth_key"); // Auth Key obtained by DoPosAuth(). Call this method when a valid auth token has been obtained. -
Connect to the PosBuddy device
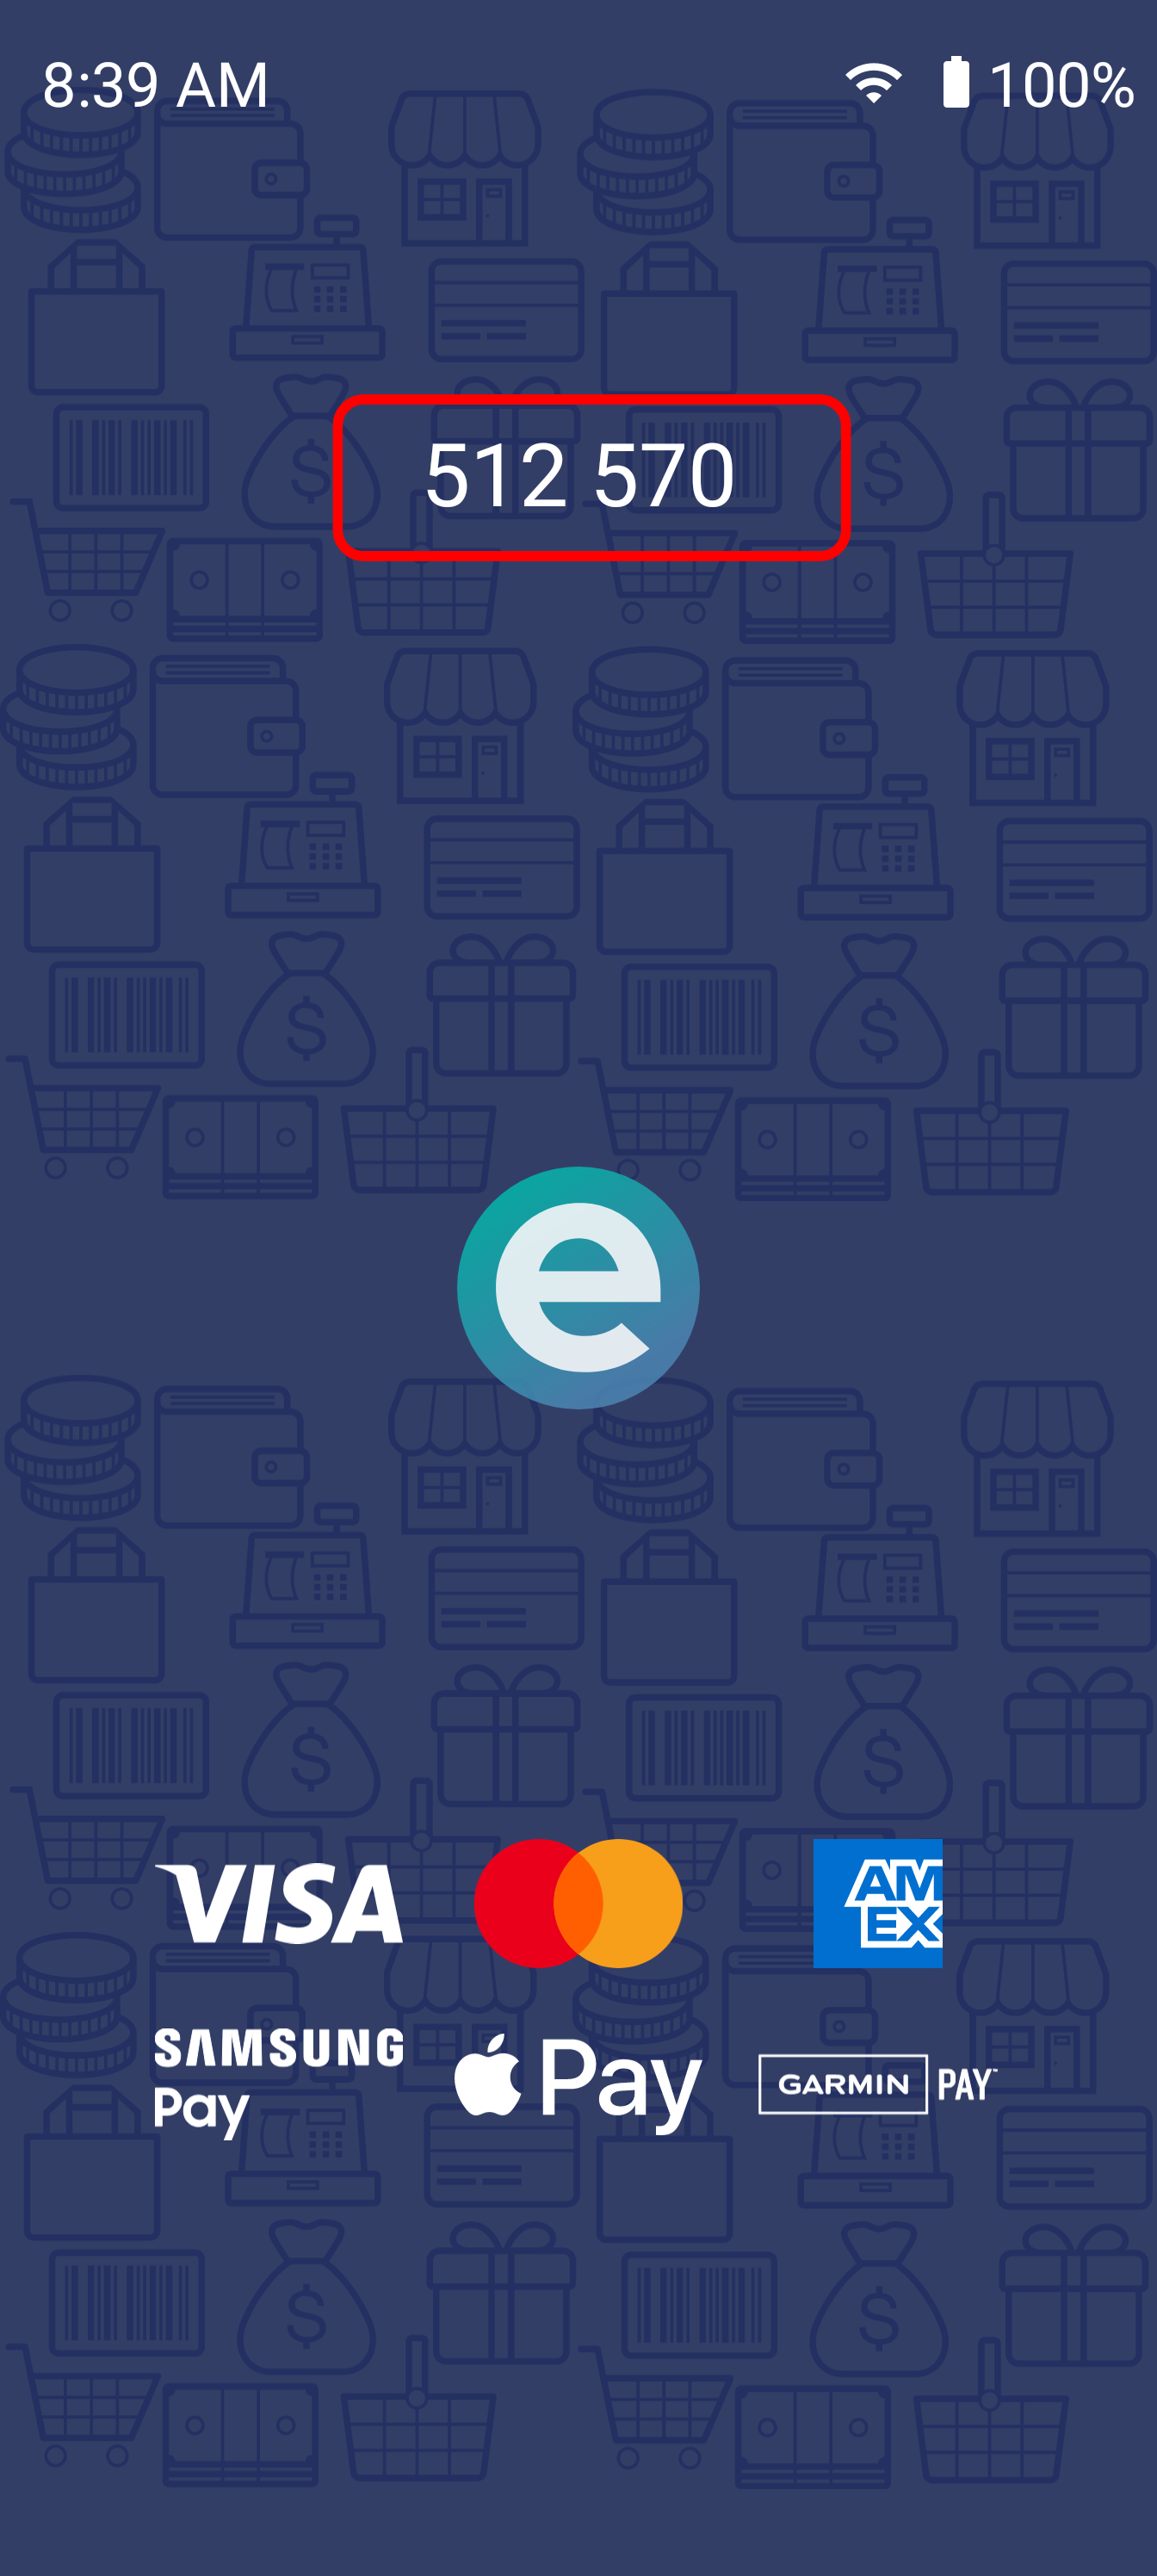
After the relevant fields have been set, the next step is to connect to the terminal to begin interacting with it and utilizing all posbuddy's features. The parameters include the friendly name of the terminal you want to connect to, and a callback function to process any change in connection status. This status callback will also be used for the duration of the connection in the event of a spontaneous disconnect from the terminal. The friendly name used for connecting to the terminal can be found on the main screen of posbuddy.\

function posbuddyStatusCallback(status) { switch (status) { case pbStatus.Connected: console.log("Status Callback: Connection success."); isPosBuddyConnected = true; break; case pbStatus.Disconnected: console.log("Status Callback: Connection Disconnected."); isPosBuddyConnected = false; break; case pbStatus.Error: console.log("Status Callback: Connection Error."); isPosBuddyConnected = false; break; } } posbuddy.connect("friendly_name", posbuddyLogCallback)Important NoteIt is important that the friendly name is easily editable as devices can change frequently and it must be possible to update the field locally when it changes.
-
Perform a POS Auth
The next step is to perform a POS Auth to obtain an authentication token(only if you do not already have one). To do a POS auth, all you need to do is call the
doPosAuth()method with the credentials given to you during the onboarding process. The callback parameter is where your authentication key will be available upon successful authentication.function posbuddyPosAuthCallback(result) { if (result["resultDescription"] == 'undefined') { console.log("Auth error: " + result.errorBundle.description + ", " + result.errorBundle.message); return; } var authResult = result["resultDescription"]; if (authResult == "SUCCESS") { posbuddy.setAuthenticationKey(result["authenticationKey"]); } } posbuddy.doPosAuth("secretKey", "accessKey", posbuddyPosAuthCallback);
Important NoteIt is also very import to only repeat this process in the event a transaction fails with an expired auth token error.
-
Start Transacting
Now that all the setup and initialization is complete you can start transacting and using some of posbuddy's other features. The parameters include the sale amount in cents, any extra parameters that you wish to place in the sale bundle and the callback to process the sale result. In the sale response, it is encouraged to look at the isApproved flag for an indication of whether or not your sale request was approved or declined.
function posbuddySaleCallback(result) {
  console.log("Payment result: " + result);
}

// Do a sale for R10.00
posbuddy.doSale(1000, null, posbuddySaleCallback);
{
"result": "SUCCESS",
"commandId": "PAY_APP_RESPONSE",
"commandPayload": {
"resultDescription": "APPROVED",
"isReceiptDataAvailable": "true",
"resultCode": "01",
"receiptBundle": {
"STATUS": "APPROVED",
"PROCESSING_CODE": "0",
"RC_DESCRIPTION": "Approved",
"AMOUNT_CENTS": "10000",
"ABS_AMOUNT": "100.00",
...
...
...
},
"isApproved": "true",
"launchType": "SALE",
...
...
...
}
}Other Features
-
Transaction Lookup
To lookup a previous transaction, you need the transaction's specific UUID; or if the most recent transaction is what you are looking for, that is not necessary.
Sending a transaction lookup request is very simple. All you need to do is call thedoTxRequest()method. The parameters required are the desired transactions UUID (or an empty string for the most recent transaction) and the callback method to receive the receipt bundle if the transaction is found.function posbuddyTxLookupCallback(result) { // Process tx result here console.log("Response received: " + result); } posbuddy.doTxRequest("tx_uuid", posbuddyTxLookupCallback);Important NoteFor transaction surety and reconciliation, it is strongly recommended that this feature is implemented
-
Line Item Display
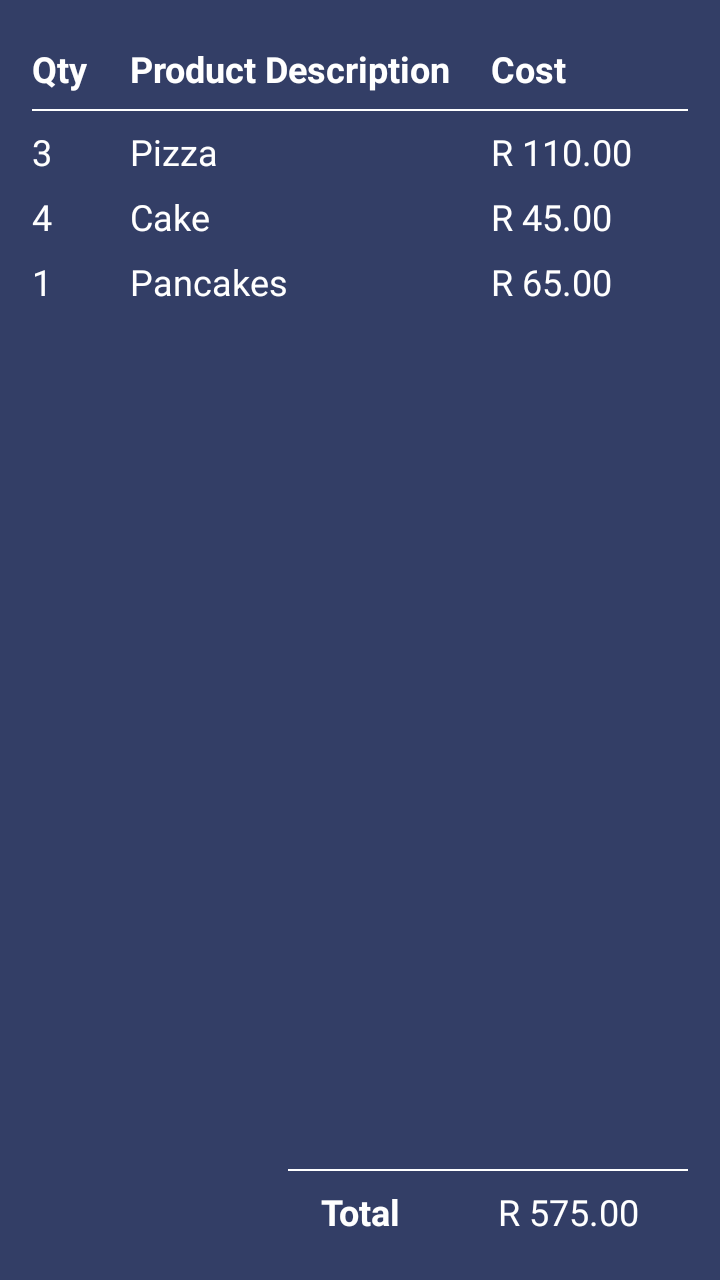
To display the selected line items on the posbuddy device, simply call
displayItems()with a string containing the user formatted total and a list of items to be displayed.\// For the sake of this example lets create some items to add to the cart let items = [ {description: "Pizza", price: "R 110.00", count: "3"}, {description: "Cake", price: "R 45.00", count: "4"}, {description: "Pancakes", price: "R 65.00", count: "1"} ]; // Now display those items on the terminal posbuddy.displayItems("R 575.00", items);The above example results in the following screen being displayed on the posbuddy terminal:\

-
Barcode Scanning
The process of setting up you solution to work with the terminal's barcode scanner is very simple. The only step is to set the barcode callback where you would handle the scanned barcode using
setBarcodeCallback().\function posbuddyBarcodeCallback(barcode) { // Handle barcode here console.log("Scanned barcode: " + barcode); } posbuddy.setBarcodeCallback(posbuddyBarcodeCallback); -
Cashback
To do a cashback transaction, all you need to do is modify the parameters that are passed to the
doSale()method. The call then works as follows: The amount that is passed in the amount field of thedoSale()is then the total amount of the sale with the cashback amount added and an extra parameter is passed in theextraParametersfield. For example, lets say the amount of the items being purchased is R50.00 and the customer requests a cashback of R20.00, then the amount passed todoSaleis R70.00 and the R20.00 is passed with acashAmounttag in theextraParametersfield.\function posbuddyDoCashbackCallback(result) { // Process sale result here like any other sale console.log("Response received: " + result); } // Remember to pass any amount as cents let extraParameters = { "cashAmount": "2000", }; posbuddy.doSale(7000, extraParameters, posbuddyDoCashbackCallback);
API Reference
What is an API function?An API functions with the goal of allowing different systems, applications and devices to share information with each other. APIs work by translating a user's input into data, which helps a system send back the right response
connect(friendlyName, callback)
Connects to a posbuddy device using a websocket connection.
ParametersdeviceId: The device identifier stringcallback: The status callback which will propagate the websocket connection status\
NoteTo ensure the plugin function correctly, make sure to set the merchant ID and POS ID fields using their respective set methods before calling
Connect().The callback that gets passed to this method is also used for any connection status changes for this connection. For example if the connection is broken by a network loss or the posbuddy device disconnects for any reason, this is the method that is called when that connection status changes.
disconnect()
Disconnects from the posbuddy device.clearItems()
Clear the items on the line display of the terminal.displayItems(totalCost, items)
Display items on the terminal: Quantity, cost, description and total Cost.
ParameterstotalCost: Total cost to display on terminal screen in cents.items: List of items to display on terminal screen
setForeground(foreground, callback)
Sets whether or not the PosBuddy app is in the foreground or background of the terminal.
Parametersforeground: Flag to indicate PosBuddy visibility.callback: The callback to receive the operation result.
getSettings(callback)
Queries the terminal for the current autoStart and runInBackground settings.
Parameterscallback: The callback to receive the settings.
updateSettings(autoStart, runInBackground, callback)
Update the terminal settings for autoStart and runInBackground.
ParametersautoStart: Flag to set PosBuddy to start automatically on device boot.runInBackground: Flag to minimize PosBuddy after a transaction.callback: The callback to receive the operation result.
doPosAuth(secretKey, accessKey, callback)
Do a pos auth. We Authenticate the POS once which allows it to forward the authkey to the transacting terminal.
ParameterssecretKey: The provided secret key.accessKey: The provided access key.callback: The auth callback action which will receive the authentication response payload.
The structure of the response received in the callback is as follows:\
{
  "result": "SUCCESS",
  "commandId": "POS_AUTH_RESPONSE",
  "commandPayload": {
    "resultDescription": "SUCCESS",
    "authenticationKey": "RECEIVED-AUTH-KEY",
    "sessionTimeout": "86400000"
  }
}
doRefund(uuid, amount, extraParameters, callback)
Initiate a refund transaction. For a matched refund, include the UUID of the original transaction. Leave UUID empty for unmatched refunds.
Parametersuuid: The original transaction UUID.amount: The amount of the refund in cents.extraParameters: Extra parameters to include on the refund payload.callback: The refund action callback which will return the result of the refund.
doSale(amount, extraParameters, callback)
Initiate a sale transaction.
Parametersamount: The amount of the sale in cents.extraParameters: Extra parameters to include on the sale payload.callback: The sale action callback which will return the result of the sale.
doQrSale(amount, extraParameters, callback)
Initiate a QR Code sale transaction.
Parametersamount: The amount of the QR sale in cents.extraParameters: Extra parameters to include on the QR sale payload.callback: The QR sale action callback which will return the result of the QR sale.
doDeposit(amount, extraParameters, callback)
Initiate a deposit transaction.
Parametersamount: The amount of the deposit in cents.extraParameters: Extra parameters to include on the deposit payload.callback: The deposit action callback which will return the result of the deposit.
doBalanceEnquiry(extraParameters, callback)
Initiate a balance enquiry.
ParametersextraParameters: Extra parameters to include on the balance enquiry payload.callback: The balance enquiry action callback which will return the result of the balance enquiry.
doTxRequest(uuid, callback)
Request the data on a specific transaction. To request the last transaction done, simply leave theuuidfield empty.
Parametersuuid: The UUID of the desired transactioncallback: The transaction request callback which will return the result of the request.
pingDevice(callback)
Sends a ping request to the device and verifies if it receives a reply back.
Parameterscallback: The ping callback action which will return the response payload of the ping request, containing some information on the device.
printHtml(html, css, width, callback)
Send a print HTML command to PosBuddy.
Parametershtml: The HTML string containing the layout for desired print job.css: The CSS string containing formatting for the HTML.width: The width of the device printer in pixels.callback: The print callback action which will contain the payload of the print response.
setAuthenticationKey(authenticationKey)
Set The authentication token that was generated by the server on a successful authentication request.
ParametersauthenticationKey: The authentication key string returned when performing auth.
setBarcodeCallback(callback)
Set the function to call when a barcode is scanned.
Parameterscallback: The callback action when a barcode is scanned by the device while its connected.
setMerchantId(merchantId)
Set the Merchant ID. Needed for transacting.
ParametersmerchantId: The merchant ID string.
setPosId(posId)
Set the pos identifier to be used for this session
ParametersposId: The pos identifier related to where the transactions will be initiated from.
The below code is a sample application that connects to a PosBuddy terminal. The application sends an auth call followed by a sale.
Example implementation:
<script type='text/javascript' src='posbuddy_1.0.js'></script>

<script language="javascript" type="text/javascript">
    // Example implementation of PosBuddy in javascript
    // To use it, copy the code into a file with a .html extension and update the device specific variables

    var selected_items = [];
    var pb = new posBuddy(pb_writeLog);

    // Device specific variables
    // Update these with your own environment variables
    pb.setApplicationKey("6397dead-7d4b-47f7-a0a5-71e5d1705fc4");
    pb.setUsername("default");
    pb.setMerchantId("000000002451");
    pb.setAuthenticationKey("2e4c6acd-9a66-439e-8d02-b39588081559");
    pb.setBarcodeCallback(pb_barcodeCallback);
    pb.connect("123456", pb_statusCallback); //This number can be found on the POSBuddy app.

    // Initiate the auth call, result returned to pb_authCallback
    function startAuth() {
        pb.doAuth(pb_authCallback);
    }

    // Process result of auth. On success, start payment
    function pb_authCallback(obj) {
        if (typeof obj.errorBundle != 'undefined') {
            console.log("Auth error: " + obj.errorBundle.description + "\n" + obj.errorBundle.message);
        }
        else {

            pb.setAuthenticationKey(obj.authenticationKey);
            startPayment();
        }
    }

    function pb_barcodeCallback(barcode) {
         console.log("Received barcode: " + barcode);
    }

    // Function to display items and initiate the payment process
    function startPayment() {
        // display items
        selected_items.push({ "description": "Hamburger", "price": 5200, "count": 1 });
        let total_amount = 5200;
        pb.displayItems(total_amount, selected_items);

        selected_items.push({ "description": "Coffee", "price": 3000, "count": 1 });
        pb.displayItems(total_amount, selected_items);
        total_amount += 3000;

        // start payment after 3 seconds
        setTimeout(() => {
            pb.doSale(total_amount, null, pb_saleCallback);
        }, 3000);

    }

    // This function logs debug data received from posbuddy
    function pb_writeLog(logtype, message) {
        if (logtype != pb.transmitData && logtype != pb.receiveData) console.log("Log received:" + message);
    }

    // This function logs the changes to the websocet status and start payment after connection success
    function pb_statusCallback(status) {
        switch (status) {
            case pbStatus.connected:
                console.log("Received status: connected");
                startAuth();
                break;
            case pbStatus.disconnected:
                console.log("Received status: disconnected");
                break;
            case pbStatus.error:
                console.log("Received status: error");
                break;
        }
    }

    // This function is called when a payment is finished
    function pb_saleCallback(obj) {
        console.log("salecallback received: " + JSON.stringify(obj));
    }

</script>
Updated 2 months ago
